Welcome to the comprehensive guide on How to Remove Kneaded Erasers from Carpet. We all know that kneaded erasers are artists’ best friends, but sometimes they find their way into our carpets, creating an unsightly mess. Whether you’re a parent, an artist, or anyone else who has encountered this common household issue, this guide is crafted just for you.
Quick Navigation
Why Do Kneaded Erasers Stick to Carpets?
Components of Kneaded Erasers
Kneaded erasers are made from a specific type of rubber, designed for art and sketching. This rubber often contains materials that increase its stickiness, which allows it to lift graphite or charcoal from a surface easily.
Factors that Contribute to Stickiness
Humidity and warmth can make kneaded erasers even stickier. When they come into contact with your carpet, the fibers can intertwine with the eraser, making it difficult to remove.
The Initial Step
Quick Assessment
Before you go about the removal process, assess the situation. Is the kneaded eraser deeply embedded into the carpet or just on the surface? The method you choose will depend on this.
Safety Measures
Before you proceed with any of the methods, ensure that you’re taking appropriate safety measures. Put on gloves and make sure you’re working in a well-ventilated space.
DIY Solutions
While there are numerous methods for tackling this sticky issue, the DIY solutions are especially appealing due to their cost-effectiveness and ease of application. Here, we will explore three versatile methods in greater detail: the Water and Soap Method, the Ice Cube Trick, and the White Vinegar Technique.
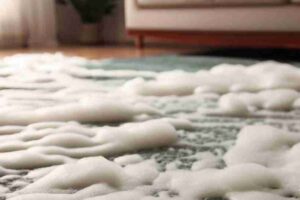
Water and Soap Method
Why It Works
The combination of water and soap works because the soap serves as a surfactant that breaks down the sticky components of the kneaded eraser, while water acts as a medium to disperse these broken-down particles.
Steps to Follow
- Prepare a soap solution by mixing lukewarm water and a few drops of dish soap in a bowl.
- Dampen a cloth with the solution and gently blot it onto the kneaded eraser stuck on the carpet.
- Wait for about 10 minutes to allow the solution to penetrate the eraser.
- Use a soft-bristle brush to gently scrub the area, breaking the kneaded eraser into smaller pieces.
- Use a clean cloth to dab away the broken-down particles.
- Rinse the area with plain water to remove any soapy residue.
What to Look Out For
Be sure not to oversaturate your carpet, as excess moisture can lead to mold growth. Also, always test a small hidden area of your carpet with the soap solution first to ensure that it won’t cause discoloration.
Ice Cube Trick
Why It Works
Cold temperatures make the kneaded eraser hard and brittle, thus making it easier to remove.
Steps to Follow
- Take an ice cube and place it directly onto the kneaded eraser.
- Allow the eraser to freeze for about 5-10 minutes.
- Use a flat, blunt object like a butter knife to gently scrape off the now-hardened eraser.
- Vacuum the area to remove any remaining particles.
What to Look Out For
Be careful not to scrape too hard, as you could potentially damage the carpet fibers.
White Vinegar Technique
Why It Works
White vinegar is an excellent natural cleaner that breaks down the adhesive components of the kneaded eraser.
Steps to Follow
- Dab a small amount of white vinegar onto a cloth.
- Apply the cloth to the kneaded eraser and let it sit for about 5 minutes.
- Use a soft-bristle brush to gently scrub the area, breaking the kneaded eraser into smaller pieces.
- Dab away the broken-down particles with a clean cloth.
- Rinse the area with water to remove any vinegar residue.
What to Look Out For
White vinegar can have a strong smell, so make sure to ventilate the area well. Also, like with the water and soap method, test a small hidden area of your carpet first to make sure the vinegar won’t discolor it.
These DIY solutions are not just effective but also use items that you most likely already have around the house. They are also environmentally friendly and safe for pets and kids. By following these methods meticulously, you’ll have a clean, kneaded-eraser-free carpet in no time.
Professional Approaches
Steam Cleaning
Steam cleaning is an effective but costly option. The heat and moisture from the steam cleaner can easily break down the kneaded eraser.
Professional Carpet Cleaners
If DIY methods fail, it might be time to call in the pros. They have specialized tools and solvents that can tackle the most stubborn stains.
Cost and Time-Efficiency
Cost Analysis
DIY methods are generally more cost-effective but can be time-consuming. On the other hand, professional services can be costly but are quicker.
Time Required
The time needed to remove the kneaded eraser will depend on the method you choose. DIY methods may take up to an hour, while professional services are quicker but costlier.
Things to Avoid
Common Myths
People often believe that scrubbing hard will remove the eraser more effectively, which is not true and can damage your carpet.
Materials to Avoid
Avoid using bleach or harsh chemicals as they can damage the carpet fibers.
Precautions
Prevention is always better than cure. This age-old adage holds true even when you’re dealing with something as specific as a kneaded eraser stuck on your carpet. Although various methods, both DIY and professional, can help you remove the kneaded eraser effectively, taking certain precautions can save you a lot of trouble in the first place. Let’s delve into these safety measures you should consider.
Knowing Your Carpet Material
Why It’s Important
Different carpet materials react differently to cleaning agents and methods. Knowing what your carpet is made of is the first step in ensuring you don’t inadvertently damage it while trying to remove the kneaded eraser.
Steps to Follow
- Check any tags or documentation that came with your carpet for material information.
- If unavailable, you might consider doing a burn test or consulting a professional to determine the material.
What to Look Out For
Be cautious with natural fibers like wool and silk, as they can be more delicate and may react adversely to certain cleaning solutions.
Performing a Patch Test
Why It’s Important
Before you proceed with any cleaning method, it’s vital to test the cleaning solution on a small, inconspicuous area of your carpet to ensure it doesn’t cause any damage or discoloration.
Steps to Follow
- Apply a small amount of the cleaning solution to a hidden corner or underneath a piece of furniture.
- Wait for a few minutes and then check for any changes in color or texture.
What to Look Out For
If your carpet reacts negatively to the solution, rinse immediately with cold water and consider an alternative cleaning method.
Use of Protective Gear
Why It’s Important
If you’re using chemical cleaners, wearing gloves and ensuring adequate ventilation in the room can protect you from any potential harm.
Steps to Follow
- Open windows and doors to ventilate the area.
- Wear gloves and possibly a mask if you’re dealing with strong chemicals.
What to Look Out For
Always read the warning labels on any chemical solutions you are using. This will give you a clear idea of the precautions you need to take.
Keeping Pets and Children Away
Why It’s Important
The cleaning agents used, especially in professional methods, can sometimes be harmful if ingested or even touched.
Steps to Follow
- Make sure the area you are working in is off-limits to pets and children until the cleaning process is complete and any chemicals have fully dried or been removed.
What to Look Out For
Be extra vigilant in ensuring that pets and children do not come into contact with the area until you are sure it’s safe.
Reading Labels and Instructions
Why It’s Important
Whether you’re using a homemade solution or a professional cleaning product, reading the instructions and labels can provide valuable information on how to use it most effectively and safely.
Steps to Follow
- Before starting the cleaning process, read the instructions on the label carefully.
- Follow the guidelines exactly as written to avoid any mishaps.
What to Look Out For
Pay special attention to any warnings or cautions noted on the product labels. These warnings are there for a reason and should not be overlooked.
Summary
Precautions might seem like an extra step, but they are crucial in ensuring that the cleaning process is both effective and safe. They help you anticipate problems before they occur, saving you time and potentially costly errors. So before you tackle that kneaded eraser problem, take a moment to consider these safety measures. It’s always better to be safe than sorry.
Maintenance Tips
Keeping your carpet in top-notch condition is more about regular maintenance than it is about emergency cleaning sessions when something goes wrong. A well-kept carpet not only looks good but also has a longer lifespan.
Plus, if you keep up with your carpet maintenance, chances are you won’t have to go to great lengths to remove something like a kneaded eraser. Let’s explore some effective maintenance tips that can help you keep your carpet clean, elegant, and kneaded-eraser-free.
Regular Vacuuming
Why It’s Important
Dust and dirt can act like sandpaper against your carpet fibers, breaking them down over time. Regular vacuuming removes these particles and can help prevent stains from getting ground in, making it easier to remove things like kneaded eraser when accidents happen.
Steps to Follow
- Vacuum your carpet at least once a week, more often if it’s a high-traffic area.
- Use a high-quality vacuum cleaner with strong suction.
What to Look Out For
Empty the vacuum bag or canister regularly to maintain optimal suction. Also, make sure to clean the filters as per the manufacturer’s instructions.
Spot Clean Spills Immediately
Why It’s Important
The quicker you clean up a spill or remove something like kneaded eraser, the less likely it is to become a permanent stain.
Steps to Follow
- As soon as the spill happens, blot it with a clean cloth to remove as much of the spill as possible.
- Apply a carpet cleaner suitable for your carpet type.
What to Look Out For
Always dab or blot—never rub—as rubbing can spread the stain and push it deeper into the carpet fibers.
Use Carpet Protectors
Why It’s Important
Carpet protectors create a barrier that can make it easier to clean up spills and can even prevent some substances from sticking to your carpet in the first place.
Steps to Follow
- Apply a commercial carpet protector as per the manufacturer’s instructions.
- Reapply every 6-12 months, or after deep cleaning your carpet.
What to Look Out For
Ensure the protector is suitable for your carpet type, and always test on a small area first to ensure it won’t damage or discolor the carpet.
Deep Cleaning
Why It’s Important
Even with regular vacuuming, your carpet will need a deep cleaning occasionally to remove embedded dirt and grime.
Steps to Follow
- You can hire a professional service or rent a carpet cleaner machine.
- Follow all instructions and precautions for the best results.
What to Look Out For
If using a rented carpet cleaner, make sure you are aware of any chemicals being used, especially if you have pets or children.
Keep a ‘No Shoes’ Policy
Why It’s Important
Shoes can bring in dirt, grime, and all kinds of things you don’t want on your carpet. A ‘no shoes’ policy can help keep your carpet cleaner.
Steps to Follow
- Place a mat at the entrance for people to wipe their feet.
- Keep a shoe rack near the door where everyone can leave their shoes.
What to Look Out For
Ensure guests are aware of your ‘no shoes’ policy, and maybe even keep some indoor slippers available for them to use.
Regular maintenance can make a world of difference in the longevity and appearance of your carpet. It might seem like a chore now, but a little prevention can save you a lot of hard work in the long run. By following these tips, you’ll not only have a carpet that looks and feels great but one that’s also ready to face the challenges of kneaded erasers and more.
Real-life Examples
While theory and general advice are helpful, there’s nothing quite like real-world examples to offer insight and tips on how to tackle a particular problem—in this case, removing kneaded eraser from your carpet. Let’s delve into some anecdotal experiences to see what worked for people, what didn’t, and what you might try if you find yourself in this sticky situation.
The Artistic Toddler Incident
What Happened
Jenny, a mother of two, found herself in a predicament when her toddler decided to be an artist not just on paper, but also on their living room carpet. The medium of choice? Kneaded eraser.
How It Was Solved
Jenny tried the ice-cube method. She put some ice cubes in a Ziploc bag and placed it on the kneaded eraser, hardening it enough to be scraped off. She then used a mild detergent to clean up any residues.
Takeaway
For relatively fresh kneaded eraser issues and especially on more delicate carpets, using the ice-cube method can be effective without harming the fabric.
A Dog’s Playtime Fiasco
What Happened
Mark, a pet owner, discovered that his dog found a kneaded eraser and considered it a chew toy. The aftermath? Bits of kneaded eraser pressed into the bedroom carpet.
How It Was Solved
Mark went for the vinegar solution. He mixed one part white vinegar with two parts water and sprayed it on the eraser marks. After letting it sit for a few minutes, he scrubbed the area with a brush. It took some elbow grease, but the eraser came off.
Takeaway
Vinegar can be a potent cleaning agent, but ensure you perform a patch test first, especially on colored carpets, to avoid any discoloration.
The Sleepover Debacle
What Happened
Sarah hosted a sleepover for her teenage daughter and friends. Post sleepover, she discovered kneaded eraser bits all over the carpet in her daughter’s room.
How It Was Solved
Sarah opted for a professional cleaning service. The service used specialized equipment to extract the kneaded eraser and cleaned the entire carpet to make it look as good as new.
Takeaway
When the affected area is large or if you’re dealing with a particularly stubborn case, calling in professionals might be the best solution.
Accidental Office Mishap
What Happened
Mike, who often works from home, accidentally dropped kneaded eraser bits on his office carpet while multitasking between calls and paperwork.
How It Was Solved
Mike used a combination of scraping and vacuuming. He first scraped off as much of the eraser as he could with a spatula. He then vacuumed the area thoroughly to get rid of the smaller bits.
Takeaway
Sometimes a combination of simple methods can also yield effective results, especially for minor incidents.
Real-life examples bring valuable lessons because they offer a wide range of scenarios and solutions. What works in one situation might not work in another, and sometimes, you have to get creative or seek professional help. So, if you find yourself wrestling with the kneaded eraser on your carpet, remember you’re not alone—and yes, there’s always a way to clean up the mess!
Environment-Friendly Methods
In today’s increasingly eco-conscious world, many of us are looking for greener alternatives to common household challenges, including cleaning tasks. If you’ve got a kneaded eraser squished into your carpet and are wondering how to get rid of it without resorting to harsh chemicals or methods that are harmful to the planet, you’ve come to the right place. Let’s explore some environmentally friendly strategies to tackle this sticky issue.
Baking Soda and Vinegar
Why It Works
Both baking soda and vinegar are staple items in eco-friendly cleaning due to their natural cleansing properties. Baking soda absorbs oils and can act as a mild abrasive, while vinegar can break down residues.
Steps to Follow
- Sprinkle a generous amount of baking soda over the kneaded eraser stain.
- Gently scrub with a brush to loosen the eraser particles.
- Vacuum the area to remove baking soda and loosened eraser.
- Spray a mixture of equal parts water and vinegar over the stain.
- Blot with a clean cloth until the stain is gone.
Precautions
Always conduct a patch test on a hidden area of your carpet to ensure these substances won’t bleach or damage the fabric.
Cornstarch
Why It Works
Cornstarch can act as a natural absorbent, making it useful in lifting out more deeply embedded kneaded eraser pieces from the carpet.
Steps to Follow
- Sprinkle cornstarch over the kneaded eraser spots.
- Let it sit for 15–20 minutes to absorb the eraser.
- Vacuum thoroughly.
Precautions
Be cautious when using cornstarch on wet stains as it might create a paste that could be more challenging to remove.
Ice Cubes
Why It Works
Freezing the kneaded eraser makes it easier to pick or scrape off, reducing the need for any chemicals or cleaning agents.
Steps to Follow
- Place ice cubes in a cloth bag.
- Hold it against the kneaded eraser until it hardens.
- Use a spatula or dull knife to gently scrape off the frozen eraser.
Precautions
Avoid letting the ice melt and wet the carpet as this can make the eraser more challenging to remove.
Reusable Cloth Over Paper Towels
Why It Works
Using reusable cloth towels instead of paper towels is more eco-friendly and just as effective.
Steps to Follow
- Use a cloth towel to blot any liquid if you have applied any cleaning solution.
- Rinse and wash the cloth for reuse.
Precautions
Ensure that you wash your reusable cloth towels separately from your regular laundry to avoid any cross-contamination.
When dealing with kneaded erasers in your carpet, going green doesn’t mean compromising on effectiveness. Natural, household products can be equally efficient while being kinder to the planet. The key is to understand which method is best suited for your specific situation and always remember to take proper precautions to protect your carpet’s material and color.
FAQ:
Can I use heat to remove kneaded eraser?
Heat can make the eraser stickier. It’s advisable to use cold methods like the ice cube trick.
Is it necessary to vacuum after cleaning?
Heat can make the eraser stickier. It’s advisable to use cold methods like the ice cube trick.
What should I do if DIY methods fail?
If DIY methods fail, consider hiring professional carpet cleaners.
Conclusion
You now have the ultimate guide on how to remove a kneaded eraser from the carpet. Whether you go for DIY solutions or professional services, the key is to act quickly and follow the steps diligently. Good luck, and may your carpet be as good as new in no time!